Orthopedic drills and saws support precise bone work, but efficient use means more than working quickly. It depends on choosing suitable equipment, checking its condition, and following the manufacturer’s instructions. How to use orthopedic drills and saws efficiently is therefore a question of preparation, control, and communication—not speed alone.
A clear setup can prevent avoidable interruptions. Confirm that the selected instrument and attachments match the planned procedure, and verify that components are intact and functioning as directed. Keep the sterile field organized. A labeled tray, visible connection points, and a ready backup can make a real difference when the room is busy. Small details matter. So does a pause.
During use, trained surgical teams should follow established protocols and the device’s instructions for use. Maintain a controlled grip, monitor the instrument’s performance, and coordinate with the team around the operative plan. Bone quality, anatomy, and equipment design vary, so one approach does not fit every case. That is easy to overlook. It deserves attention.
This guide introduces seven practical ways to improve workflow, equipment readiness, and instrument care. It also recognizes an important limitation: general guidance cannot replace hands-on training, clinical judgment, or local protocols. Efficiency should support accuracy and patient safety. If a tool behaves unexpectedly, stop and follow the appropriate safety procedure rather than forcing progress. A moment spent checking may save time later—and sometimes the better choice is to reassess.
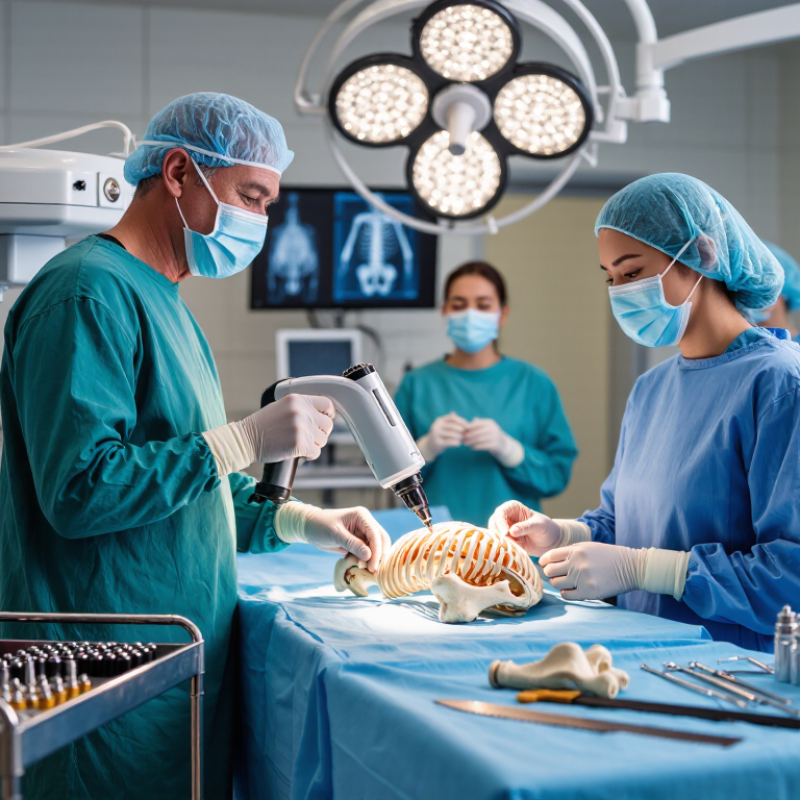
Orthopedic drills and saws perform distinct tasks. A rotary drill creates pilot holes, screw channels, or paths for guidewires. Cannulated drills follow a wire, helping keep a planned trajectory. Compact drills suit tighter working spaces, while larger systems may support broader bone preparation. Oscillating saws make controlled cuts across bone; reciprocating saws can reach areas where a straight blade is difficult to position. The right choice depends on the procedure, anatomy, and surgeon’s plan—not simply on motor speed.
Match tool to task. Drill bits differ in diameter and cutting geometry, so the selected bit must suit the intended fixation and bone. Saw blades also vary in length and width, affecting access and cut control. Heat matters: a 2012 review by Augustin and colleagues in Archives of Orthopaedic and Trauma Surgery discusses evidence that bone exposure near 47°C for one minute can cause thermal injury. This is a warning, not a universal operating threshold; irrigation, pressure, blade condition, and contact time all influence heat. A worn blade can cut poorly, even when the instrument feels powerful. In practice, choosing between drill and saw is not always obvious. Teams should follow their procedure-specific training and equipment instructions, while checking alignment and cutting performance throughout use.
| Best Practice | Instrument Type and Role | Efficient Use | Safety and Quality Check |
|---|---|---|---|
| 1. Match the instrument to the task | Orthopedic drills create holes for fixation and guide wires; oscillating or reciprocating saws cut bone; reamers enlarge prepared channels. | Select the instrument and compatible attachment based on the procedure, bone, and required task. Prepare only the instruments needed for the planned steps. | Confirm compatibility, intended use, and operating instructions in the device’s instructions for use (IFU). Use only under the direction of a qualified surgical team. |
| 2. Check the instrument before use | Powered handpieces, batteries or power supplies, drill bits, saw blades, and attachments each have specific inspection and setup requirements. | Verify assembly, secure attachment, battery or power readiness, and the function of controls before the procedure, following the IFU. | Do not use damaged, loose, blunt, or otherwise defective components. Follow facility protocols for sterile processing and sterility checks. |
| 3. Choose the correct cutting accessory | Drill bits vary by diameter and design; saw blades vary by geometry and intended application. Accessories are designed for particular systems and uses. | Confirm the accessory matches the planned fixation or cutting task, instrument, and surgical approach before it is passed to the operator. | Check the IFU for approved accessories and use limits. Do not substitute an accessory solely because it appears to fit. |
| 4. Maintain a clear, organized workflow | Drills, saws, and related attachments are used at different stages of orthopedic procedures. | Arrange instruments in the order expected for the procedure and communicate clearly when changing attachments or moving between drilling and cutting steps. | Keep the operative field and cables or connections organized in accordance with sterile-field and operating-room protocols. |
| 5. Use controlled technique | Drills advance a rotating bit; powered saws move a blade in a device-specific cutting motion. | Use the technique taught for the procedure and the specific instrument. Maintain appropriate control and avoid forcing the tool through bone. | Instrument handling and settings must follow the surgeon’s training, the IFU, and local protocols. Avoid contact with unintended tissue and structures. |
| 6. Manage heat and debris | Drilling and sawing can generate heat and bone debris, particularly when cutting is prolonged or an accessory is worn. | Use the irrigation, clearing, and cutting approach specified for the procedure and device. Replace accessories when required by the IFU or facility protocol. | Monitor the operative field and follow clinical protocols intended to limit thermal injury and manage debris. Do not apply unapproved cooling or cleaning methods. |
| 7. Clean, inspect, and process after use | Reusable handpieces and attachments require validated reprocessing; single-use items must be handled according to their labeling. | Separate components as directed and promptly send reusable instruments through the facility’s approved cleaning, inspection, and sterilization workflow. | Follow the IFU and institutional infection-prevention procedures. Do not reuse single-use devices or return instruments to service if they fail inspection. |
Confirm the procedure, patient position, and prepared surgical site. Keep the area visible, and arrange drapes to avoid catching cables. Follow sterile-field protocols. Small details matter.
Under good light, check the handpiece, cable or battery, attachment, and cutting accessory for damage or contamination. Confirm the bit or blade is secure. If something feels wrong, stop and ask.
Use the instrument instructions and the surgical team’s protocol. Consider the bone, attachment, and planned task. There is no single setting for every case. Never guess.
Use steady, controlled movement and avoid excessive pressure. Apply irrigation when clinically appropriate, and confirm it reaches the cutting area. Heat can build quickly.
Watch for binding, unusual vibration, smoke, discoloration, or sudden changes in sound or resistance. These signs are not precise temperature readings. Pause and inspect.
Do not simply press harder. Check for a worn bit, blocked flutes, or a blade that is binding. That pause may feel inconvenient, but forcing the cut can reduce control.
Keep the blade aligned with the planned path and use gentle forward movement. Repeated plunging can create uneven cuts and extra heat. Timing pauses is not always easy.
Familiar setups can still reveal issues with attachment choice, irrigation, or control. A brief review may identify useful changes. It will not replace sound judgment.
How to use orthopedic drills and saws efficiently begins with understanding the purpose and characteristics of each instrument, then matching the tool to the planned procedure and the needs of the surgical team. Careful preparation includes confirming that the operative site and instruments are ready, checking that equipment is functioning correctly, and selecting power settings in accordance with the manufacturer’s guidance and established clinical protocols.
Efficiency also depends on choosing compatible attachments and using a controlled technique suited to the task. Steady, deliberate motion can support precision and help limit excess heat, while avoiding unnecessary force or prolonged contact. After each procedure, instruments should be cleaned, inspected for wear or damage, and maintained according to approved reprocessing procedures. Consistent preparation, careful handling, and routine maintenance help support reliable performance and patient safety.

 Clerivida Medical