How to Maintain Sterility of Orthopedic Instruments?

Time:2026-10-10 Author:Amelia
0%

Orthopedic instruments face demanding sterilization challenges. They often carry bone fragments, blood, and tissue into narrow joints, cannulas, and serrated surfaces. A clean-looking instrument is not necessarily sterile. Residue can remain inside a hinge or beneath a detachable component.

This article explains how to maintain sterilization of orthopedic instruments through disciplined, evidence-based processing. It connects point-of-use care, safe transport, thorough cleaning, inspection, packaging, sterilization, and documented release decisions. Manufacturers’ instructions for use should guide every step, especially for powered tools, delicate implants, lumened devices, and heat-sensitive components. Qualified sterile processing professionals should also follow validated facility procedures and current clinical standards.

Small details matter.

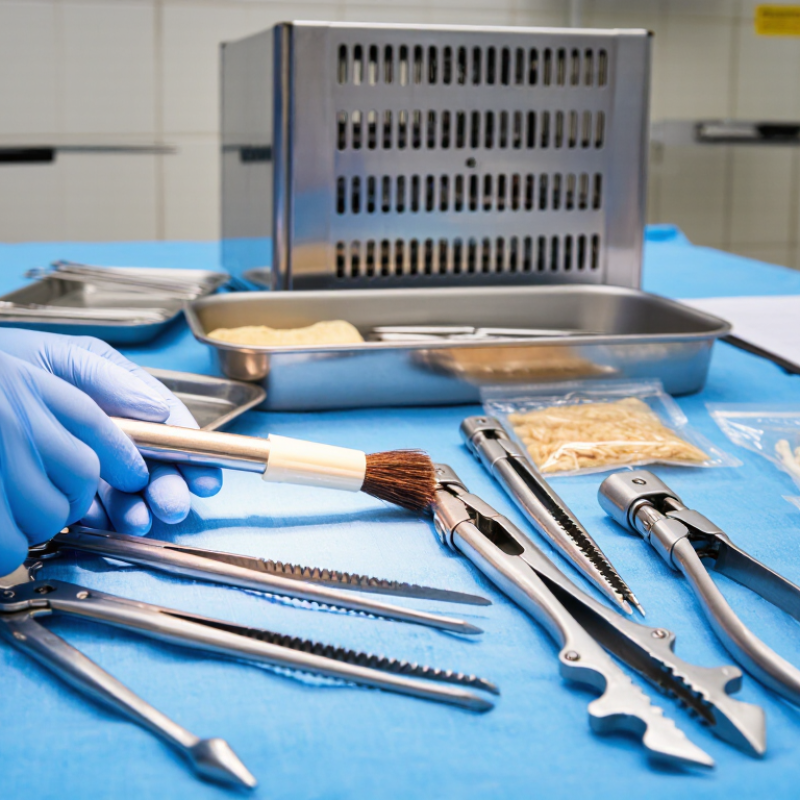
A brush must reach the entire channel. Hinges should remain open during cleaning. Instruments need complete drying before packaging, because trapped moisture can compromise wrapping and storage. Sterilizer cycle records, chemical indicators, biological monitoring, and routine equipment maintenance provide essential evidence that the process is working. Yet no workflow is flawless. Staff may miss a hidden groove, misunderstand an instrument’s instructions, or rush inspection during a busy surgical day. These weak points deserve honest review, not blame.

Reliable practice includes competency training, traceability, environmental controls, and clear responses to failed monitoring or damaged packaging. It also requires ongoing reflection. If an instrument returns with visible soil, unusual moisture, or a questionable seal, it should not be used until properly evaluated and reprocessed. Sterility is not created by one machine cycle; it is protected by a consistent chain of informed decisions.
How to Maintain Sterility of Orthopedic Instruments?

Understanding Sterility Requirements for Orthopedic Instruments

How to Maintain Sterility of Orthopedic Instruments?

Understanding sterility requirements begins with thorough cleaning, not sterilization alone. Blood, bone fragments, and tissue can remain inside hinges, cannulated shafts, or narrow grooves. These residues may shield microorganisms from the sterilizing process. Staff should follow validated cleaning instructions, use suitable brushes, and inspect every surface under proper lighting. Hinges should move freely, and internal channels should be visibly clear.

Sterilization parameters must match the instrument material, design, and approved processing method. Teams should monitor cycle time, temperature, pressure, and approved chemical or biological indicators. Packaging must remain sealed, dry, and undamaged after processing. Store sets in clean, controlled areas, away from moisture and heavy traffic. Traceability records should connect each set with its cycle, operator, and inspection results. A routine can still fail. For example, an instrument may appear clean while retaining debris inside a channel.

Tips: Separate delicate instruments from heavy items. Keep hinged tools open during cleaning and sterilization. Never force wet packages into storage. Reprocess any package with a torn seal, puncture, or moisture. Review local requirements and facility procedures regularly. Experienced staff should also question repeated shortcuts, because familiarity can hide small errors.

Preparing Instruments for Cleaning and Decontamination

How to Maintain Sterility of Orthopedic Instruments?
Preparing Instruments for Cleaning and Decontamination

Effective sterility begins before instruments enter the decontamination area. At the point of use, remove visible bone, blood, and tissue with a soft, approved tool. Keep surfaces moist according to the instrument manufacturer’s validated instructions. Do not allow debris to dry inside cannulas, hinges, or narrow channels. Separate sharp items carefully, open hinged joints, and disassemble components only when permitted. Use a closed, labeled container for transport. Staff should wear appropriate protective equipment and follow facility procedures.

Tips: Check each instrument under strong light. Flush channels promptly. Keep heavy trays from crushing delicate parts. Never mix unknown chemicals. Record unusual damage.

Cleaning results can fail when preparation seems rushed. A tiny fragment inside a reamer may protect microorganisms during later processing. I have seen teams focus on the tray exterior while missing hidden joints and threaded areas. That mistake is easy to repeat. Follow the current instructions for use, water quality, detergent concentration, contact time, and automated equipment. If an instrument arrives dry or visibly damaged, pause the workflow and notify the responsible supervisor. Document the finding. Trained technicians should inspect every surface, because “looks clean” is not a reliable standard. A second check may feel slow, but it can prevent a larger sterile-processing failure.

How to Maintain Sterility of Orthopedic Instruments? - Preparing Instruments for Cleaning and Decontamination

Preparation Stage Required Action Important Details Verification Point
Point-of-use treatment Begin treatment as soon as practical after the procedure. Remove gross soil and keep instruments moist with an approved method. Do not allow blood, bone, or tissue to dry on the surfaces. No visible drying or heavy organic residue before transport.
Safe transport Place contaminated instruments in a closed, leak-resistant container or cart. Separate contaminated devices from clean supplies and use designated routes where required by facility policy. Container is intact, labeled, closed, and not overloaded.
Personal protective equipment Wear PPE appropriate for splash, sharps, and chemical exposure risks. Typical protection may include fluid-resistant clothing, gloves, eye or face protection, and other PPE specified by the risk assessment. PPE is available, correctly worn, and changed when damaged or contaminated.
Instrument identification Confirm the device type, number of pieces, and any special processing requirements. Use the current manufacturer’s instructions for use, especially for powered, cannulated, coated, or modular orthopedic instruments. Set contents are reconciled and unusual devices are identified before cleaning.
Disassembly Disassemble instruments as far as the instructions permit. Open hinged instruments, remove detachable components, and separate modular parts to expose hidden surfaces. Joints, locks, channels, and contact surfaces are accessible for cleaning.
Sharps and delicate components Handle sharp, pointed, fragile, and precision components separately and carefully. Use protective racks or approved holders when needed. Avoid contact that can cause injury, bending, or surface damage. No damaged tips, cutting edges, insulation, or alignment features are present.
Manual pre-cleaning Use the cleaning solution, water quality, temperature, concentration, and contact time specified in the instructions. Use soft brushes and non-abrasive tools. Do not use metal brushes or abrasive materials unless specifically permitted. Visible soil is removed from surfaces, joints, serrations, and recesses.
Cannulated instruments Flush and brush internal channels using the correct diameter and length of cleaning accessory. Ensure the cleaning fluid passes through the entire channel. Follow device-specific instructions for irrigation pressure and accessories. The channel is patent, visibly clean, and free of retained debris.
Powered instruments Remove batteries and detachable accessories when instructed, and protect non-immersible components. Do not immerse or lubricate powered equipment unless specifically allowed. Use approved adapters for automated processing where applicable. Components are processed by the correct method and show no fluid intrusion or damage.
Automated cleaning Load the washer-disinfector according to the validated cycle and device instructions. Avoid nesting and overloading. Position hinged instruments open and place basins or heavy items to permit drainage and spray contact. Cycle parameters are recorded and the load is arranged for complete exposure.
Inspection after cleaning Inspect instruments under adequate lighting and magnification when needed. Check for residual soil, corrosion, pitting, cracks, burrs, loss of function, and damaged insulation or coatings. Any item with soil or damage is removed from service and reprocessed or repaired.
Rinsing and drying Rinse as required and dry all external surfaces, joints, and internal channels completely. Residual moisture can interfere with packaging and sterilization and may contribute to corrosion or microbial growth. No pooled water or moisture remains before inspection, packaging, or sterilization.
Lubrication and assembly Apply only a water-soluble instrument lubricant when required by the instructions, then reassemble correctly. Avoid petroleum-based products unless specifically approved. Do not obstruct channels, joints, or sterilant contact areas. Instrument movement is smooth and all parts are correctly fitted.
Packaging and sterilization readiness Package clean, dry, and functional instruments using materials and configurations compatible with the selected sterilization cycle. Do not package wet, visibly soiled, damaged, or incorrectly assembled devices. Follow validated load limits and sterilization instructions. The set is complete, dry, correctly assembled, and ready for the validated sterilization process.

Processing decisions must always follow the current device manufacturer’s instructions for use, the validated facility procedure, and applicable infection-prevention requirements.

Cleaning, Inspecting, and Packaging Instruments

Maintaining sterility begins before instruments reach the sterilizer. At the point of use, remove visible soil with a compatible damp method. Do not let blood dry inside box locks, serrations, or cannulated shafts. Separate delicate parts and keep instruments moist during transport, following facility procedures. In the decontamination area, disassemble each instrument as instructed. Use the specified detergent concentration and water temperature. Flush lumens repeatedly, then brush them with the correct size brush. Manual cleaning may look simple. It is not always consistent. That is where documented training matters.

After cleaning, inspect every surface under bright light. A magnifier helps reveal dried protein, rust-like staining, pits, and hairline cracks. Check hinges, ratchets, insulation, tips, and lumen openings. Pass a clean swab through difficult channels when required. Instruments must be visibly clean, dry, and functional before packaging. Open hinged devices; do not trap moisture between closed surfaces. If an instrument sticks, feels loose, or fails alignment, remove it from service. A quick visual check can miss a serious problem.

Choose packaging that matches the instrument’s size, weight, and sterilization method. Protect sharp tips without blocking sterilant contact. Place heavier items below lighter ones, and avoid overfilling trays. Use internal and external process indicators as required by the facility’s validated system. Seal packages without folds, tension, or exposed edges. Label contents, date, load information, and initials when policy requires them. Store packs in a clean, dry area with limited handling. A torn wrapper is not a minor defect. Reprocess it. Even experienced teams occasionally miss a damp hinge. That small oversight deserves review, not blame.

Selecting and Applying Appropriate Sterilization Methods

How to Maintain Sterility of Orthopedic Instruments?

Selecting and Applying Appropriate Sterilization Methods

Sterility begins before the sterilizer starts. Orthopedic instruments often carry bone particles, blood, and lubricant inside hinges or narrow channels. Cleaning must follow the instrument manufacturer’s validated instructions. Use compatible brushes, approved detergents, and adequate rinsing. A visible inspection under strong light can reveal residue that routine handling misses.

Steam sterilization is usually suitable for heat-resistant metal instruments. The cycle must match the load, packaging, and validated equipment settings. Do not overload the chamber. Trapped air can prevent effective contact with every surface. Hinged instruments should remain open, while detachable parts should be separated when permitted. Low-temperature methods may suit heat-sensitive components, but material compatibility and aeration requirements need careful review. One method cannot safely fit every instrument.

Monitor each cycle with physical readings, chemical indicators, and biological testing according to facility policy. Keep complete records, including load details, operator checks, and any failed indicators. If a pack is wet, torn, or poorly sealed, treat it as contaminated. Reprocess it. That decision may delay a procedure, but guessing creates greater risk. In practice, small failures often expose weak training or rushed preparation. I still find this challenging: a clean-looking instrument is not proof of sterility. Regular audits, competency checks, and honest review of near misses help refine the process without hiding its imperfect parts.

How to Maintain Sterility of Orthopedic Instruments?

Selecting and Applying Appropriate Sterilization Methods

Representative minimum exposure times for wrapped instruments vary by sterilization method and cycle configuration. Steam sterilization is generally preferred for heat- and moisture-tolerant orthopedic instruments. Dry heat requires longer exposure, while low-temperature methods should be selected according to validated manufacturer instructions. Cleaning, inspection, packaging, loading, cycle monitoring, and dry storage are also essential for maintaining sterility.

Values are representative guidance points based on established healthcare sterilization recommendations; always follow the validated cycle parameters for the specific instrument and sterilizer.

Storing, Handling, and Monitoring Sterile Instruments

How to Maintain Sterility of Orthopedic Instruments?

Sterility begins with controlled storage, not the operating room. Keep wrapped orthopedic instruments in a clean, dry, temperature-stable area. Store packages above the floor and away from sinks, walls, and heavy traffic. Avoid crushing, bending, or stacking packs too tightly. A torn wrapper, wet spot, or broken seal requires careful assessment before use. When doubt remains, reprocess the instrument according to approved facility procedures. Small details matter.

Handling must protect both the package and the instrument. Clean hands, appropriate protective clothing, and a dry work surface reduce avoidable contamination. Move sterile packs gently, especially those containing sharp retractors or delicate cutting tools. Check the package label, sterilization indicator, and condition before opening. Do not open a pack until the team is ready. A common weakness is rushing this step. It saves seconds, but it can compromise confidence in the process.

Tips: Use a documented inventory and rotate instruments by processing date. Record sterilization cycles, load contents, chemical indicators, and biological monitoring results. Review records when an indicator changes unexpectedly or equipment behaves differently. Train staff to report damaged packaging instead of hiding minor errors. Periodic audits can reveal problems that routine checks miss. No system is perfect. Reflection after each irregular event helps improve storage, handling, and monitoring practices.

FAQS

When should cleaning begin?

Cleaning should begin at the point of use. Remove visible soil with a compatible damp method. Keep instruments moist during transport. Do not let blood dry in hinges or narrow channels.

How should hinged and cannulated instruments be cleaned?

Disassemble instruments as instructed. Open hinged devices before cleaning and sterilization. Flush narrow channels repeatedly, then brush them with the correct size brush. A small channel can hide residue.

What should staff inspect after cleaning?

Inspect every surface under bright light. Check hinges, ratchets, tips, insulation, and lumen openings. Look for dried protein, staining, pits, cracks, or loose parts. A magnifier may reveal what normal handling misses.

When should an instrument be removed from service?

Remove it if it sticks, feels loose, or fails alignment. Also remove instruments with damaged insulation, cracked tips, or blocked openings. Do not rely on appearance alone. That shortcut can fail.

How should instruments be arranged for packaging?

Choose packaging that matches the instrument’s size, weight, and sterilization method. Place heavier items below lighter ones. Avoid overfilled trays. Protect sharp tips without blocking sterilant contact.

What should happen to a damaged or wet package?

Treat a wet, torn, or poorly sealed package as contaminated. Reprocess it according to facility procedures. A torn wrapper is not a small defect. Delay is safer than guessing.

Which sterilization method is suitable for orthopedic instruments?

Heat-resistant metal instruments commonly use steam sterilization. The cycle must match the load, packaging, and validated equipment settings. Heat-sensitive components may require a low-temperature method. One method cannot fit every instrument.

How can facilities improve sterilization reliability?

Monitor physical readings, chemical indicators, and biological tests as required. Record load details, operator checks, and failed indicators. Provide regular training and competency checks. We still miss things sometimes. Honest review helps correct rushed preparation.

Conclusion

Maintaining the sterility of orthopedic instruments requires a consistent, carefully controlled process from initial use through final storage. The first step is understanding the required sterility level for each instrument and treating used equipment as contaminated. Instruments should be safely collected, opened or disassembled when appropriate, and transported for cleaning without allowing contaminants to dry on their surfaces.

How to maintain sterilization of orthopedic instruments depends on thorough cleaning, detailed inspection, proper packaging, and the correct sterilization method. Staff should remove visible soil, check for damage or residue, and package instruments so that sterilizing agents can reach all surfaces. The selected method must match the instrument’s materials and manufacturer-approved processing limits. After sterilization, instruments should be stored in a clean, dry, controlled area, handled as little as possible, and protected from damaged packaging or moisture. Routine monitoring, documentation, and timely response to failed indicators help confirm that sterile conditions are consistently maintained.

Amelia

Amelia

Amelia is a seasoned marketing professional with a wealth of expertise in our company’s core offerings. With an unwavering passion for driving growth and innovation, she plays a pivotal role in shaping our marketing strategies and enhancing brand visibility. A key aspect of her responsibilities......